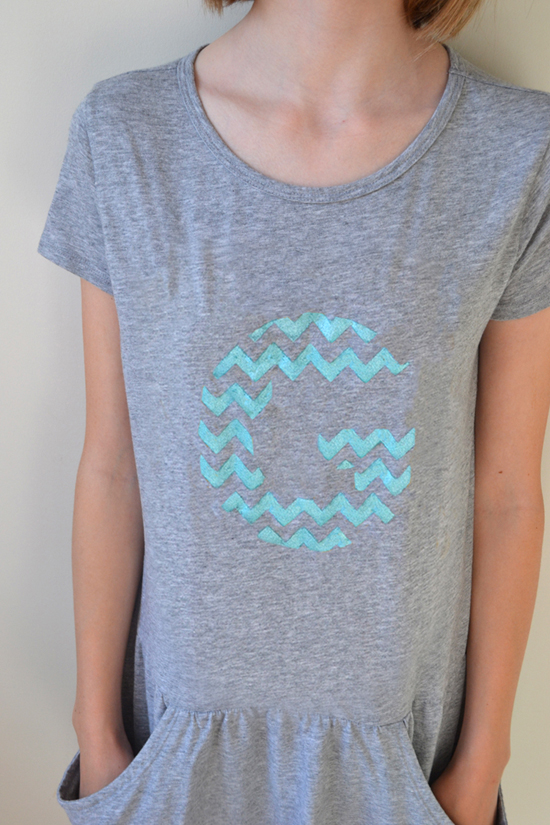
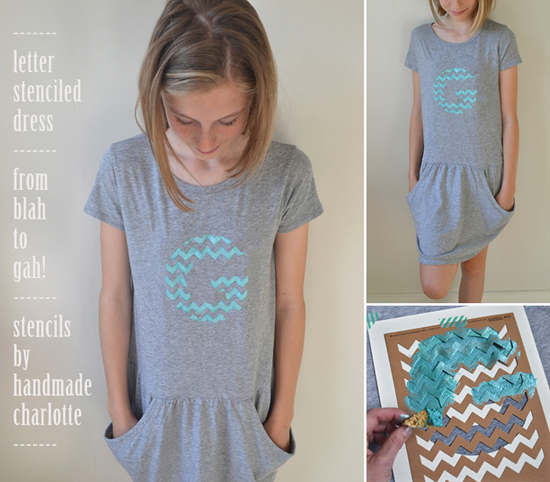
I ordered my Handmade Charlotte stencils months ago and have been waiting to finally use them. (There are never enough hours in the day!). The dresses came from Old Navy. I’m hoping that by the time I write this post they are still available. But if not, you can use any plain dresses, t-shirts or tank tops. This project is a bit challenging, although it looks simple enough. The trick is in the seepage… or trying to prevent seepage. And, of course, I made it twice as tricky with my double stencil. (The letter stencil plus the Handmade Charlotte stencil). But it can be done!
Supplies:
~ Dress, t-shirt, tank top, sweatshirt, bag… anything
~ Stencils by Handmade Charlotte
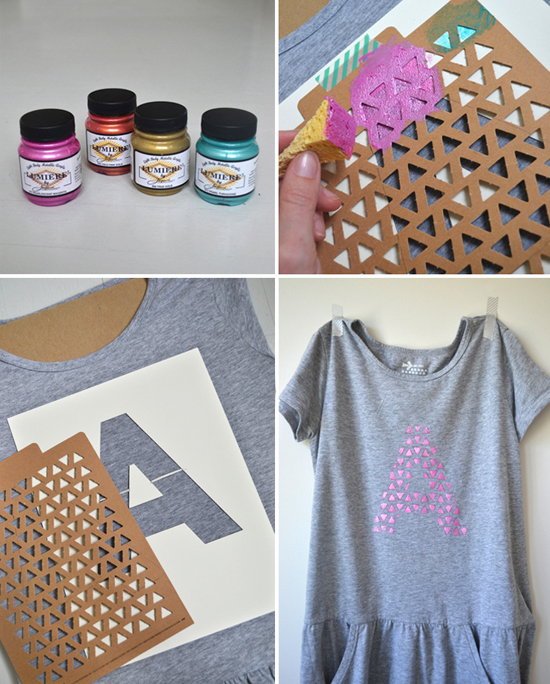
~ Letter Stencil (download and print on card stock) A-I, J-Q, R-Z
~ Fabric Paint. I used Lumiere pearlescent paint (pearl turquoise and pearl magenta).
~ Large piece of cardboard
~ Sponge pieces
How to:
I’m the kind of girl who dives right into projects. I often skip the part where I should research or read directions. But you are smarter and more prepared than I am! You are already reading more than I did before getting started. Here’s what you should do (and what I have learned since attempting my first ever stenciling on fabric) to get great results:
~ Insert a piece of cardboard inside the dress. This gives you a nice, flat surface to work on and prevents leaking through to the back. Make sure that the fabric is not loose. Don’t pull it really tight, either. The cardboard needs to fit just right. I ended up pulling the fabric together in the back and taping it just to pull it a little tighter because my cardboard was too small.
~ Before you lay down your stencils, spray some adhesive to the backs. Do you see how in my pictures the stencils are floating above the fabric? This is not good. You want your stencils to be stuck to the fabric. Otherwise, the paint will seep through the edges. You want crisp edges. I achieved this by holding down the stencil as I went, but it’s a harder and messier way to do it.
~ Next, take your sponge piece (which you soften by wetting it and then squeezing out all of the water), dip it into the paint and then dab on the stencil. You don’t want too much paint, or too little. Better to start light-handed and add more as it dries if you need to.
~ Wait about 20 minutes before you peel off the stencil. Then follow the directions on the paint bottle for drying and setting.

The key to stenciling on fabric is practice! But even though I did it the hard way, I’m really happy with my girls’ dresses. They’ve already planned to wear them as beach cover-ups and collect shells in the big pockets. Yay for summer!
xo Bar


{ 2 comments… read them below or add one }
I love love love this and all of the fun things you can do with it. How is it possible I’ve never thought of this before. My daughter is very into art and would love to design some of her clothes, especially as her first day of school nears. Thanks for the post!! Will definitely pin this!
thanks rebecca, glad this idea is one that struck a chord. my girls love having their initials or names on their clothes so they were super psyched to wear these dresses (even my 13 year old)! good luck and let me know how it goes! xo bar
{ 3 trackbacks }