make it: halloween bat banner with cricut
Welcome to Small for Big! This blog is the other half of Smallful.
Small for Big is full of inspiration, playful design finds, and DIY projects. Read on for instructions to make your Cricut Explore project…
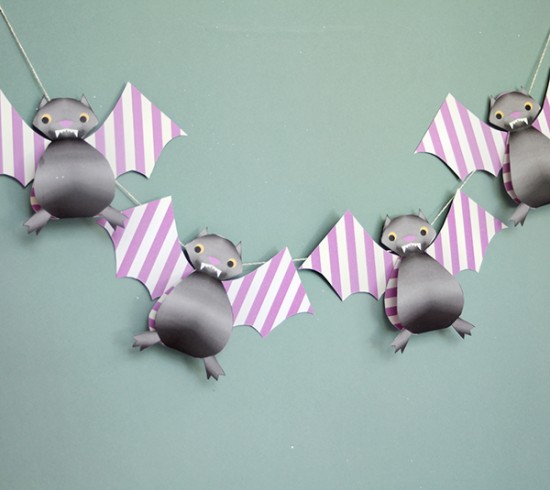
Add some flapping fun to your Halloween décor this year with a quick batch of bats. You can hang them from traditional mobile arms, or string them along like a pennant banner – I’d love to see several of them hanging across my front window, what about yours?
This Bat Banner is a cinch to make. Each bat is only 2 pieces with a couple of quick dabs of glue or tape, they’re ready to charm their way into your haunted home.
This project was designed for the Cricut Explore. But you can make it without the machine too – scroll to the bottom of the post to see how to make this printable without a Cricut machine (and with access to your handy dandy scissors!)
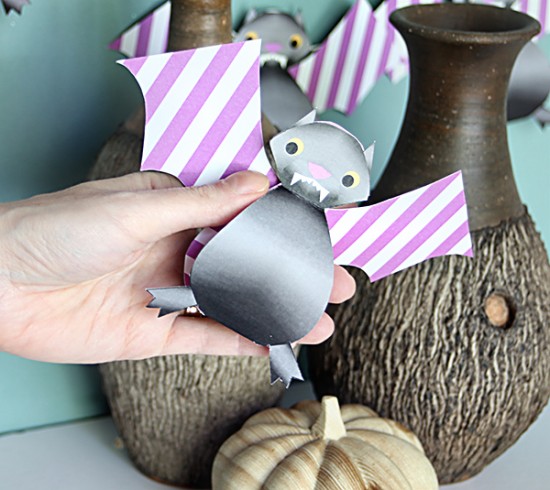
Materials:
- Cricut Explore® machine
- Cricut Design Space™ software
- Cricut® 12” x 12” StandardGrip mat
- Cricut Explore® Scoring Stylus (optional, but useful)
- White cardstock
- Glue stick or double-sided tape

Instructions:
- Before printing the pieces themselves, go to my blog and download the full striped background pattern to print the backside of your cardstock.
- Print 1 copy of the full-page stripe pattern onto your cardstock for each bat you plan to make. Then flip the cardstock over and place it back in your printer before printing the bats.
- Using the Print Then Cut option in your Cricut Design Space™ software, print all of your pieces onto 8.5” x 11” cardstock.
- Follow the steps in Cricut Design Space™ software to cut out the pieces.
Assemble:
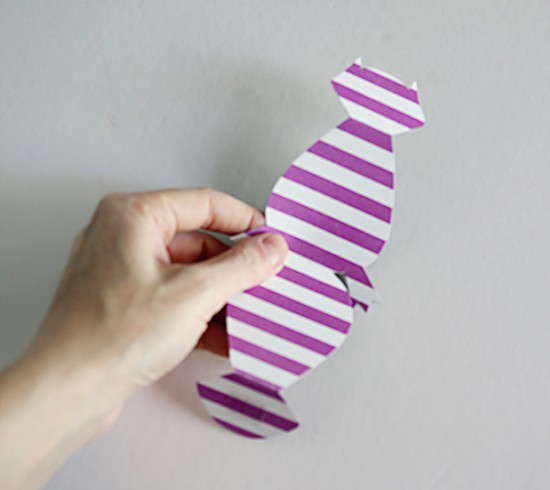
- Begin with the body of a bat. With the stripes facing inwards, curve the bat so the backs of the heads line up. Glue or tape the front and back of the head together, without folding the bottom of the bat. This creates the curved bat body.
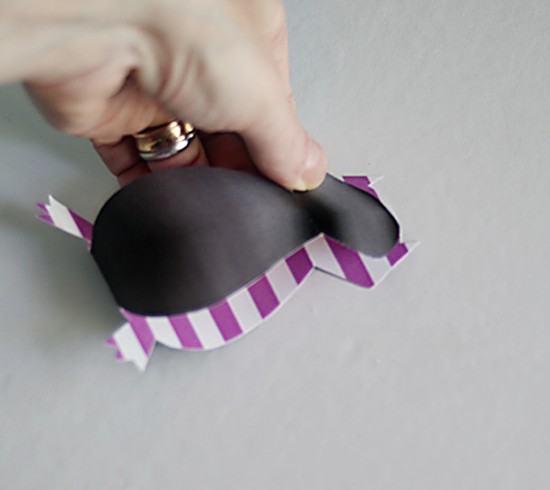
- Take the wings, and glue or tape them to the back of the bat.
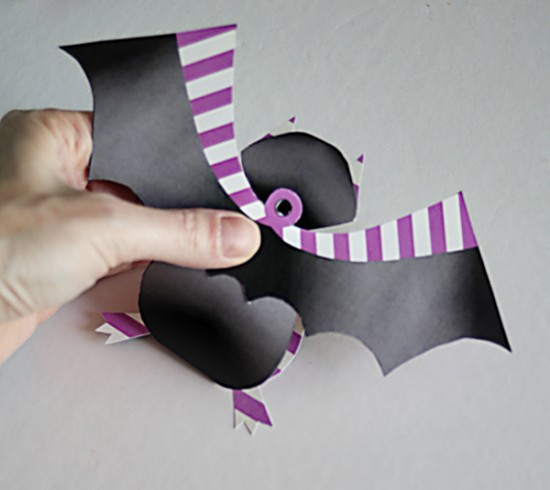
- Attach string to the hole on the wings, and string up the bats – they’re ready to fly!
Make this Printable without a Cricut machine:
If you don’t have a Cricut Explore, you can still create this project as a printable – you’ll cut them out with your scissors instead. Follow the steps below. This will let you purchase the file, and Print Then Cut by hand. There are some interior cuts you may want to ignore, but otherwise you’ll be just fine.
- Click the “Customize” button for the project you want to make from Smallful’s Cricut Shop.
- Cricut Print Then Cut projects can only print within a 5.5” x 8” area. You’ll notice the images are laid out and grouped to be printed that way – over multiple pages.
- Select each image and click the “flatten” button in the pop-up menu on the right.
- Hit “Go” and then Sign In or create a Cricut ID and enter your payment info.
- If you aren’t using the Cricut to cut, you will want to remove the bleed by clicking the ‘Bleed (for print then cut)’ box (find this by clicking the blue “more mat options”) under the print copies in the upper LH corner). This will give you a cleaner print.
- From there, click the “Print and Go” button. At this point, your printer menu will pop up and you can print the image. After you hit print, it will ask you to make sure you have connected your Cricut Explore, but you can just ignore this because you’re all finished! Now you have your own printable to cut out and use!

