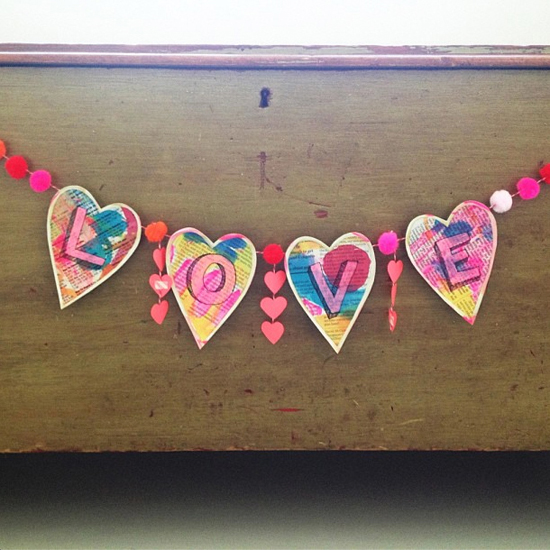
I’m crazy about garlands. Aren’t you? I love making them for my kids, my family, my friends, and just about any and every occasion. Today I am sharing with you how to make this colorful & artsy LOVE garland. It’s perfect for Valentine’s day (or any day) to give to the ones you love most.
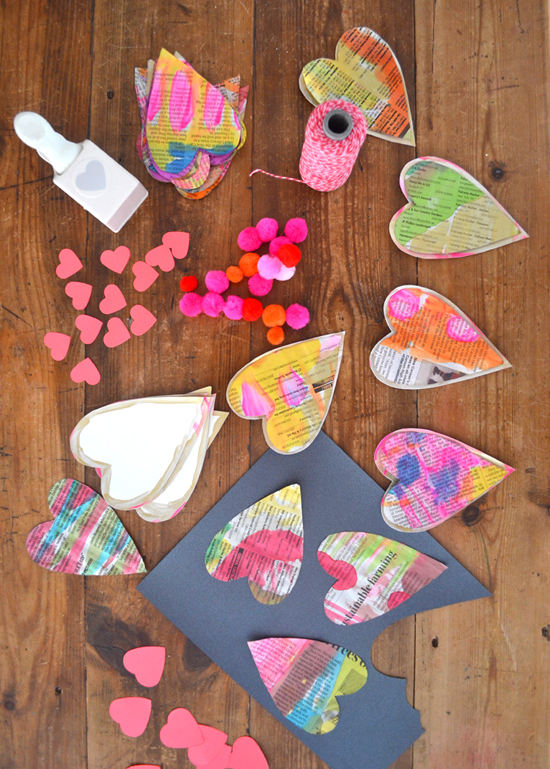
Supplies:
Newspaper
Black fine tip sharpie
Heart punch (or heart stickers)
Rubber cement
Hole punch (1/16”)
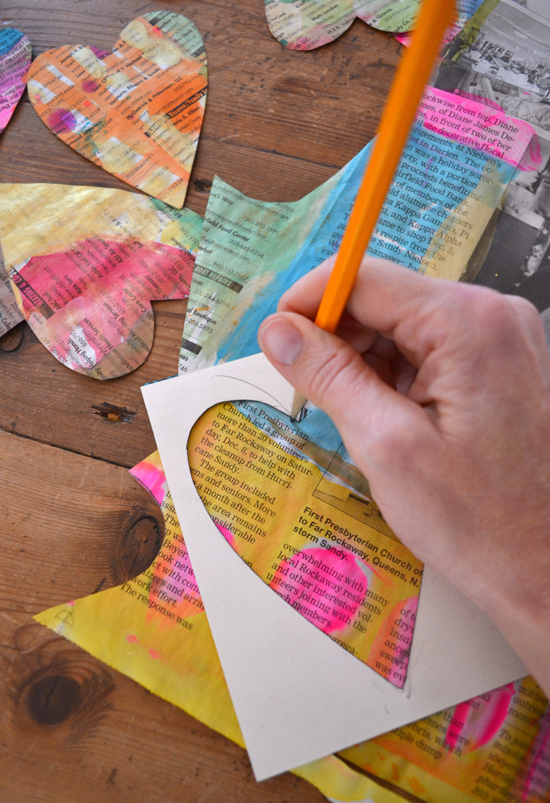
Step one: Lay out some newspaper on top of an old towel. Start painting it with shapes and stripes and dots…whatever! We used liquid watercolor, which can drench through (which is why you want an old towel underneath), but you can use regular watercolors, too. Hang dry the newspaper (a few hours), then use the stencil to cut out hearts.
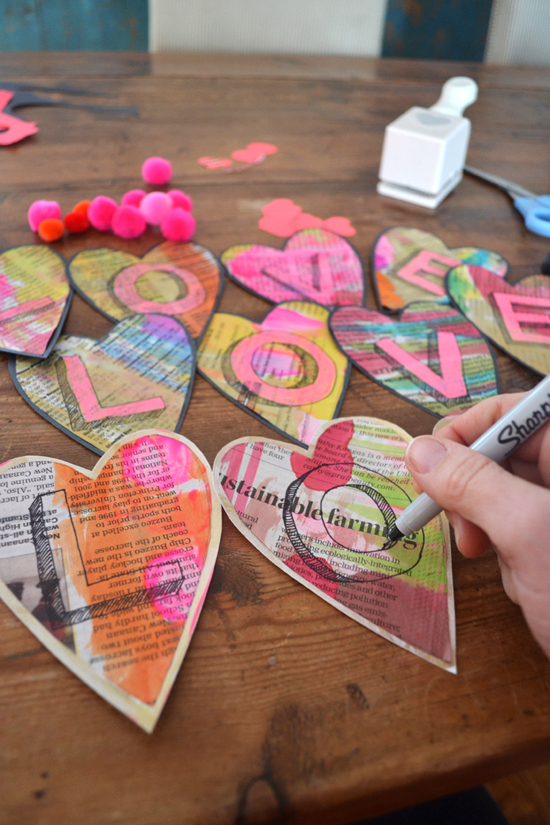
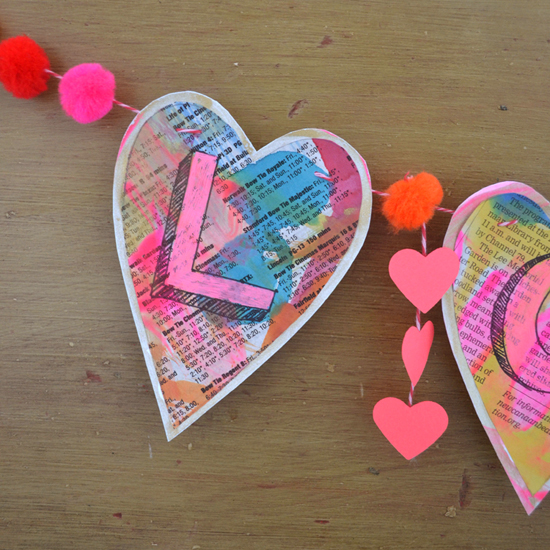
Step two: Next, use the same stencil to cut hearts from black or gold cardstock. Though this time cut the heart a bit bigger than the pencil line so when you glue on the newspaper heart there will be a little border. Glue on the hearts using rubber cement. I have mentioned this before, but the best way to use rubber cement for the strongest bond is to evenly coat both surfaces, then press wet surfaces together.
Step three: Freehand write your letters using a black fine tip sharpie. This sounds intimidating, but I know you can do it. It doesn’t have to look like mine. Make it your own! Then color in your letters with a neon pink chalkboard marker. Or…if you don’t have one, use a highlighter or a regular marker. No sweat!
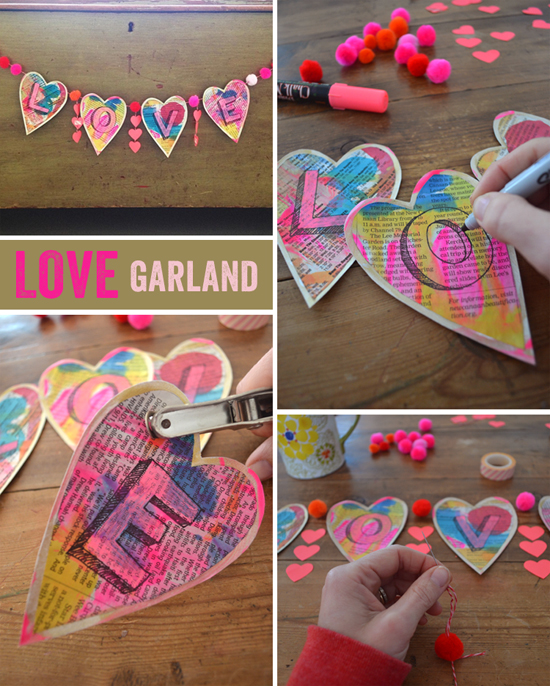
Step four: Punch holes at the top of the hearts. I punched two on each side (see photo below). Next, cut out your mini hearts with a heart stamp. If you don’t have one, you can cut them out freehand, use heart stickers, circles, or all pom-poms. Lay out your design as you would like it to look. Thread your needle with twine and start to assemble the big hearts and pom-poms together.
Step five: Lastly, thread the needle again, this time running a piece of twine through the middle of the pom-poms that are in between the letters (three altogether). Tie a knot at the top and leave the twine hanging down underneath. Attach the mini hearts with tape.
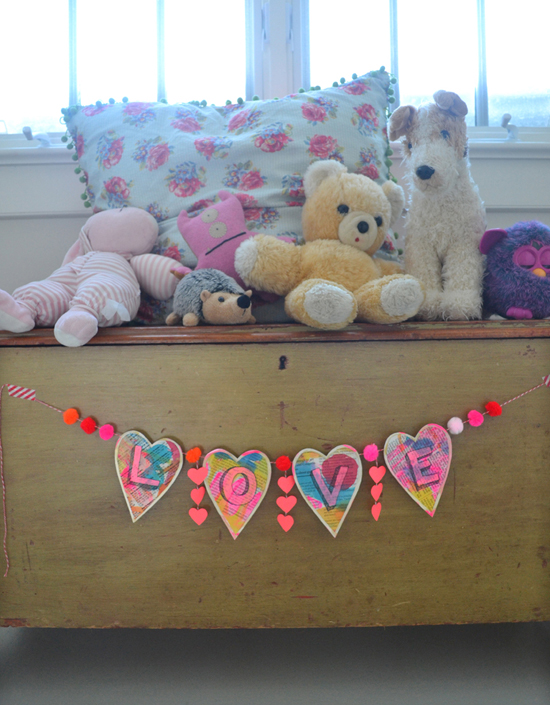
All done! There are many steps, but it is really fun to put it all together, and the kids can make most of the parts with you.
A labor of love, indeed!
xo Bar


{ 16 comments… read them below or add one }
Hello – LOVE this activity! I will be making it with my 2 kiddos that I watch in the afternoon. Should take us up to a week to finish – lol! I’m going to feature this in a post today on my blog @ http://familyliteracy2.blogspot.com/2014/01/february-heart-activities.html
Tina ‘the book lady
thank you so much tina, i love that you are sharing and i love your blog! send me photos if you can of your finished product. have fun! xo bar
this is SO charming and darling! pinning, sharing & making asap!
thanks melissa…i do hope you will make it! a good one to keep up all year round. send photos if you ever get to it! xo bar
LOVE these! Shared them on facebook here https://www.facebook.com/ImaginationStationBlog and we will be making this idea as name banners and will post at above facebook page. The colours are beautiful!!! I Love painting on newspaper.
We loved them so much we had to make them today!
http://siayla.blogspot.ca/2014/02/newspaper-heart-banner-for-valentines.html
they look amazing brooke!! i just checked them out. you are the best for doing this, you have made my day…my week!! happy valentine’s day. xo
I just started a blog and I featured your garland…Check it out!
http://entertainingdelights.com/2015/02/05/valentines-day-heart-garland/
Wonderful! Thanks!
We made this and it turned out adorable. Ours said Love and we strung it up over the tv. Even the one my 2 year old made was very cute!
That’s so wonderful, I love knowing that it worked so well for you!
Hi admin, do you monetize your blog ? There is easy method to earn decent money every month, just search
on youtube – How to earn with wordai 4
Just found through Pinterest. I’ve been interested in testing newspaper for art and this is just the push I needed. I’ll be making a Valentines garland with my 6 year old great niece. She will be wild about this!
For those working in the creative sector and DIY enthusiasts who need precise cutting for their projects, the Cricut machine is a crucial tool. It can easily cut through a variety of materials, including leather and textiles. Visit design.cricut.com/setup to complete the machine setup, which is simple to do.
With its capacity to cut materials precisely, the Cricut machine may change your creative efforts, making it an invaluable tool for DIY enthusiasts and artists. Leather and fabrics are among the many things that it can cut through. By going to design.cricut.com/setup., you may quickly configure the device.
Welcome to the world of Cricut, a powerful cutting machine that enables you to create beautiful designs and craft projects easily. With cricut.com/create, you can unlock a world of endless possibilities, from personalized gifts to home decor and beyond. To get started, simply login to the Cricut Design Space, where you can access a library of thousands of pre-designed craft projects, images, and fonts. You can manage its settings according to your needs, you can download and install the Cricut desktop app and you can work on your designs anytime.
{ 10 trackbacks }