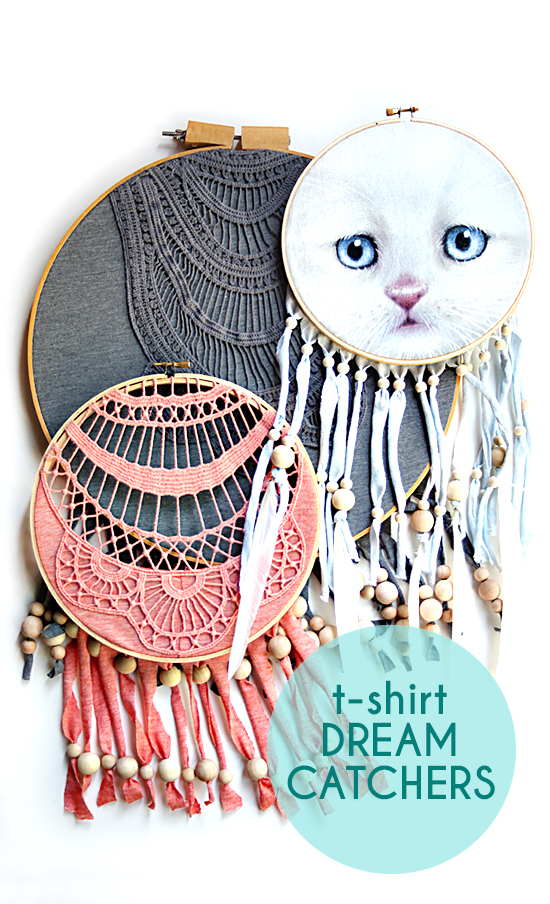
Dreamcatchers are everywhere right now – and they can serve a very practical purpose if you have kids in the house. Catch those nightmares, filter out the bad, and keep kids safe and secure in their beds each night. As long as they believe in it, it’s worth it!
I wanted to make an easy dreamcatcher with a little more personality – and without all of the knotting. It turns out all you need to do is scour your thrifty Savers for the coolest t-shirts ever, then upcycle them into an even better dreamcatcher.
 WithNational Thrift Shop Day scheduled on August 17, Savers is challenging people to show they Give a Sh!rt about their clothing footprint by making their next new t-shirt a thrifted one, and donating items they no longer need rather than throwing them in the garbage. I donated some old t-shirts and grabbed a couple “new-to-us” shirts for this craft project. I was particularly excited to find two embroidered t-shirts that fit the dreamcatcher theme perfectly – and they were under five bucks each! I even found the big embroidery hoop there.
Plus, I snagged some sweet clothes for Birdie and myself too (including some Lucky and Seven for All Mankind Jeans!). And by donating your clothes to Savers’ nonprofit partners, instead of ditching them, you can help keep hundreds of millions of tons of reusable clothing from piling up in our landfills every year. It really is a great – and enjoyable – way to live green.
So let’s make some dreamcatchers, shall we?
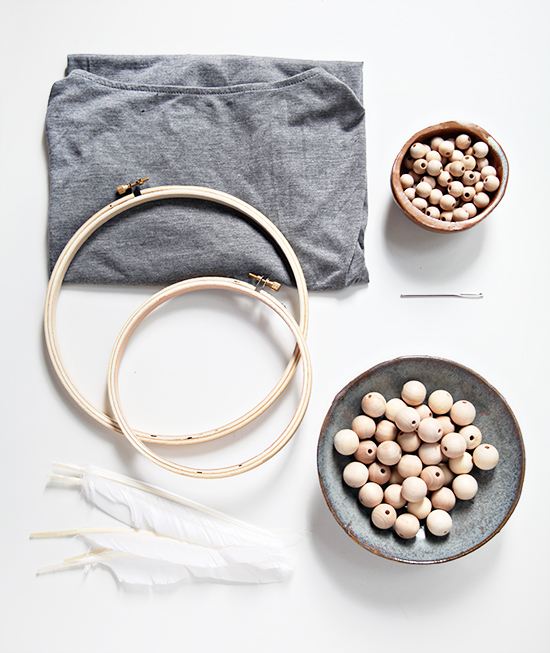
What you’ll need:
- Old T-shirt
- Embroidery hoop(s)
- Wood beads with 1/8” hole or larger
- Needle with a large eye
- Feathers
- Good fabric scissors
What you’ll do:
First, cut the front of your t-shirt away from the back. You’ll only need the front piece with the image.
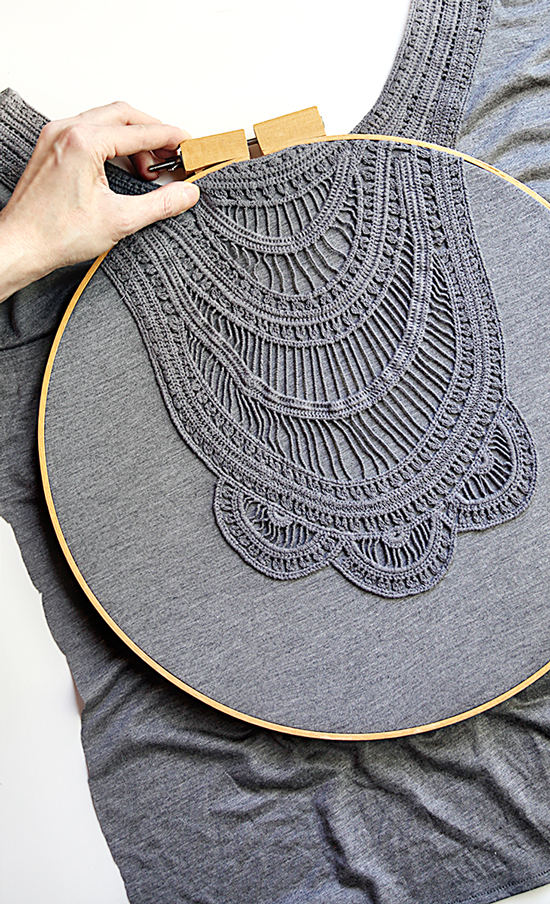
Then, take apart the embroidery hoop by loosening the screw at the top. Place the inner hoop under the image on the shirt, and line it up just how you want it. Then, place the outer embroidery hoop over the top, adjust, stretch the fabric into place, and tighten the screw at the top.
Trim off the bottom edge seam of the t-shirt and discard.
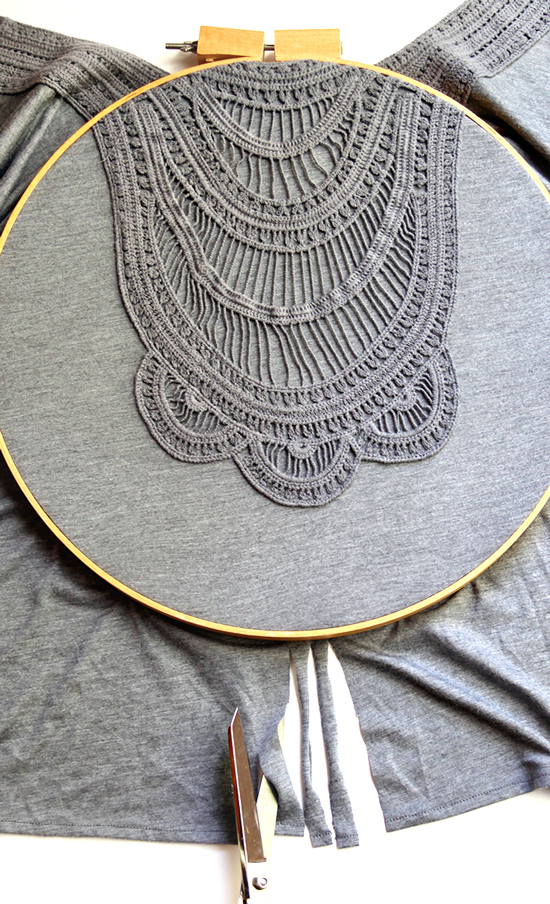
Cut the bottom of the t-shirt – the part sticking out of the bottom of the embroidery hoop – into thin strips. It’s best if they’re somewhere between ¼” and ½” wide. Especially when you’re trying to thread the needle!

Once you’ve cut the number of strips you want (mine averaged around 16-18 strips for each dreamcatcher), you can flip over the dreamcatcher, and trim off all the extra t-shirt parts.
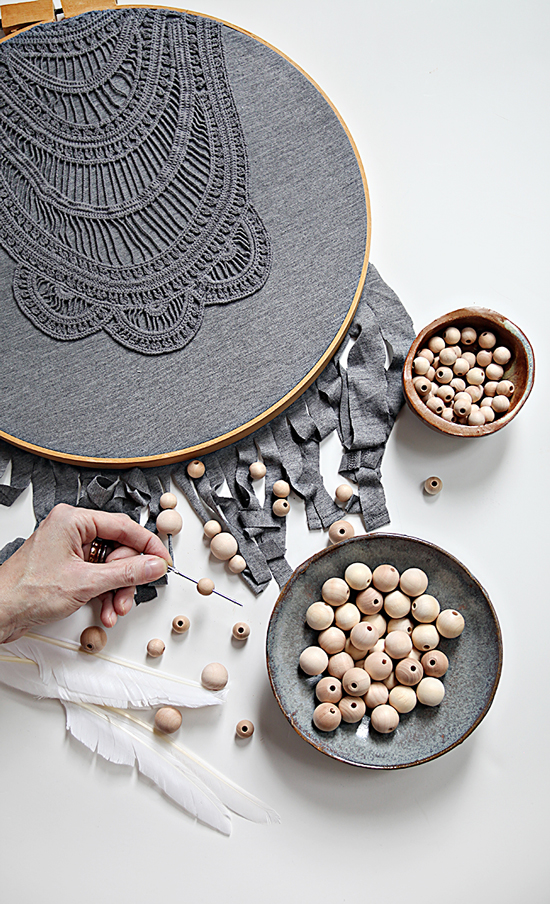
Now, string your beads. Depending on the size of the t-shirt strips, you may not need to add a knot at the end of each strip. But it will be the most stable if you do.
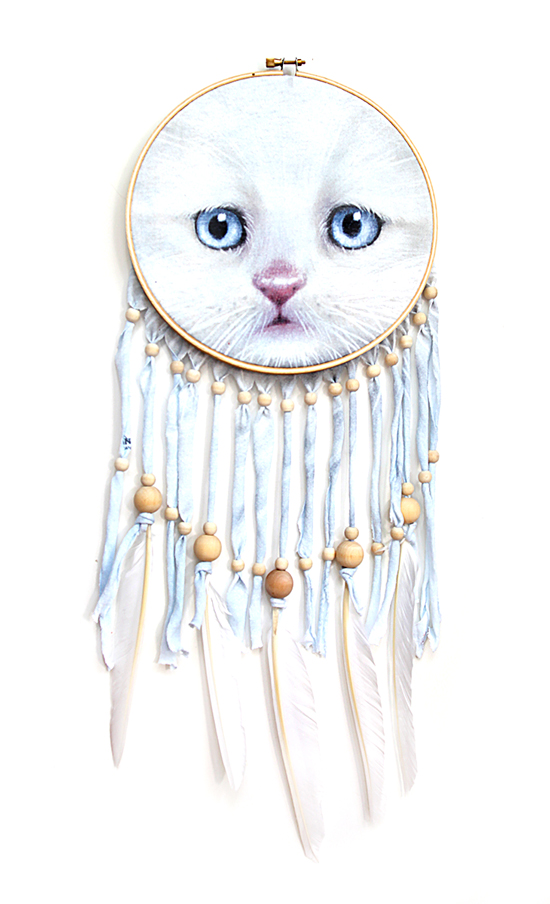
If you’d like to add feathers – I’ve found the large, ¾” beads with 1/8” holes are the perfect size to hide the end of the feather. Just string the bead onto the t-shirt strip, then poke the end of the feather into the bottom of the bead. Finish by tying the excess T-shirt strip around the feather.
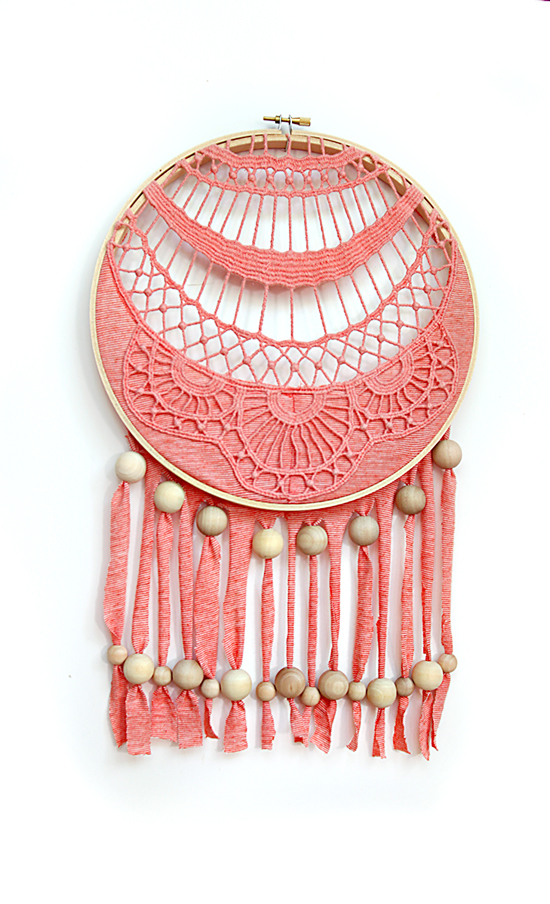
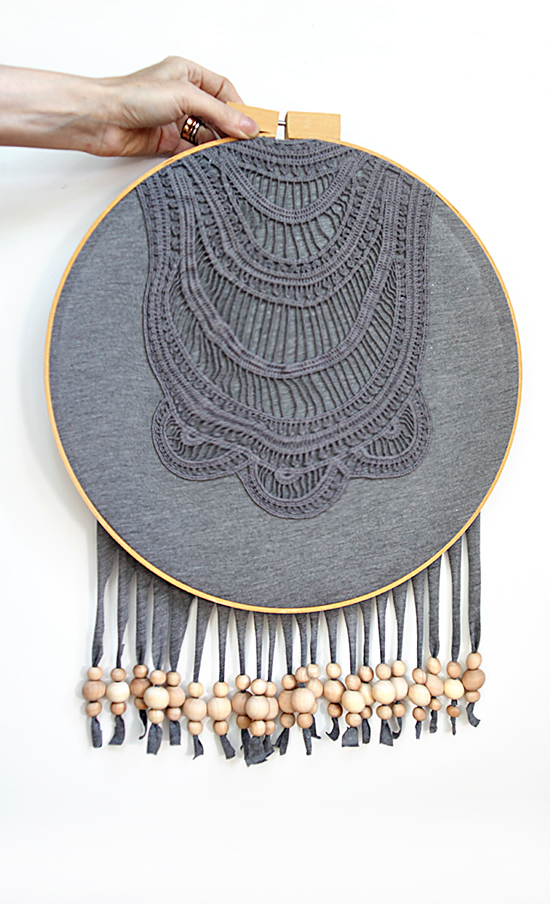
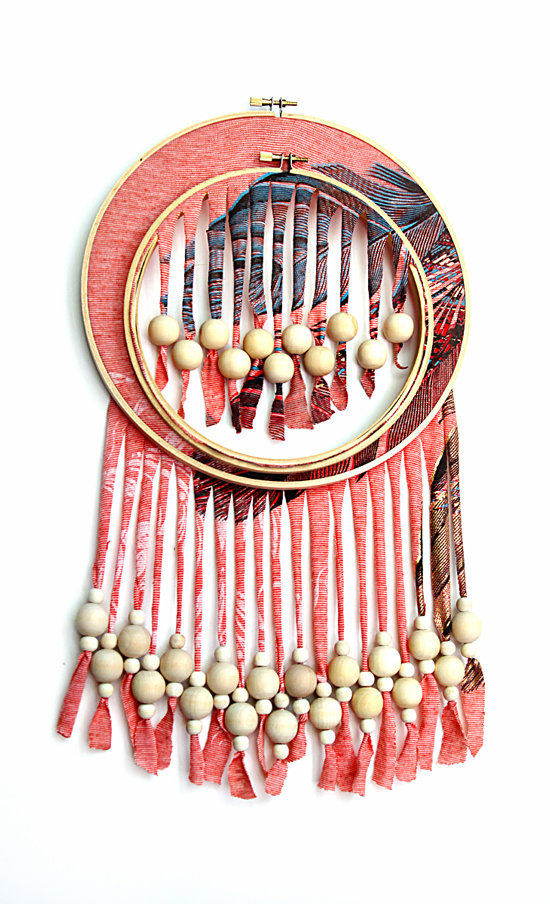
If you want to get really fancy –or if your t-shirt is a little plain – you can add a second embroidery hoop in the middle, and even more beads! Check out this dreamcatcher:
Thanks for hanging out with us today – now go find some T-shirts and get making!
A big thank you to Savers for their support of this project. As always, all opinions are my own.


{ 8 comments… read them below or add one }
Hey very nice web site!! Man .. Excellent .. Wonderful .. I’ll bookmark your web site and take the feeds additionally…I am happy to find numerous useful info here within the publish, we want work out extra techniques in this regard, thanks for sharing.
it's amazing how well they know there way around technology at such a young age…mine where the same. Great layout I do like your angry bird embellie.
It’s like you’re on a missoin to save me time and money!
"Also during Reagan’s first term, the steep rise in unemployment, followed by the steep decline shows that workers were unemployed for much less time in total again they never left the labor pool, as workers are doing today"In other words, 10.2% after 2 1/2 years of Reagan is better than 9.0 after 2 1/2 years of Obama.That's gooberlogic.
I loved what u did to the t-shirts. People make cushions out of clothing of a loved ones who have
died. (Im not fussed of the cushion) but I think this is a better way of remembering some one. Pat
Hire a professional hacker to hack facebook password onlineClick Here
Hi there buddy, this t-shirt dreamcatchers DIY you shared is so freakin awesome. I am so happy that I found this tutorials and I will try it this weekend. My wife definitely support me on this one and she will help me on it for sure!
You know what they say: “One man’s trash is another man’s treasure.” This rings even truer as we approach Earth Day and think of ways to teach our kids about keeping items out of landfills. For us, it’s the perfect excuse to get creative and give new life to everyday objects by turning them into upcycled crafts. Check out our step-by-step instructions for making this awesome DIY dreamcatcher, then read on for additional super-simple craft ideas using household items like paper tubes, coffee cans and plastic water bottles. What better way to celebrate Mother Earth?
{ 14 trackbacks }