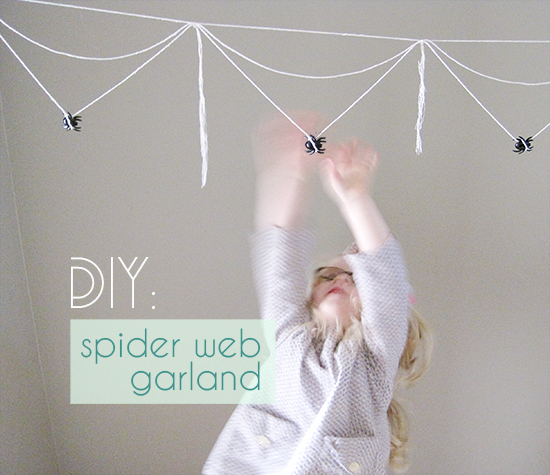
Apparently I’m obsessed with spider webs this year – all of my Halloween DIY ideas revolve around them! This easy cotton twine garland is my latest pride and joy – I wanted something that looked natural and modern at the same time. It’s hard to find ways to decorate for the season without resorting to things that feel so over-the-top. So, some twine, some time, and several spiders later, I have an 8 foot long Spider’s web. Feel free to make your garland whatever length you want, 3 and 4 foot sections would be great to hang in your windows. And check out these stick and yarn spider webs that you can make with the kids too!
What you’ll need:
- cotton twine, or yarn
- plastic spiders
- masking tape
- scissors

How to make your DIY Spider Web Garland:
- Measure out 3 lengths of cotton twine: 9 feet, 12 feet, and 17 feet. These will create the loops of your garland.
- Cut 8 pieces of twine of varying lengths to tie between each section – somewhere between 6″ – 14″ each.
- On a flat surface, mark out a masking tape template for each “pennant” of your banner. (see photos below). Each section is 12″ wide, and 6″ high.
- Take the 17 foot section, and measure out about 2 feet, this will be the extra twine at the beginning of your garland for hanging. Then line up your 9 foot and 12 foot sections and knot all 3 together. (see photo 1)
- Take one of the ties you cut in step 2, tie it around the 3 lengths, right by your first knot. (see photo 2)
- Now, stretch the shortest piece of twine (9 feet) straight across along the top. (see photo 4)
- Stretch the middle piece of twine (12 feet) through the middle, arching it midway.
- Stretch the longest piece of twine (17 feet) down to the lower 6″ tape mark. Tie it once around a spider, then stretch it back up to the upper corner. (see photo 4)
- Tie another short piece of twine around the 3 garland lengths – tie it tightly!
- Your first section is complete! Move it to the left, and continue on with the next, following steps 3 – 9 until you’re done.
This project could be completed in so many different color combinations – and if you switch out the spiders for some other trinkets, you can switch up the seasons too. Acorns? Little jewels? Feathers? The sky is the limit. But for now, Happy Halloween!


{ 2 comments… read them below or add one }
You sure know how to maximize a dollars-worth of plastic spiders. I need to go get some and make some cobwebs, too. Loved the God’s eye project!
We’re making life-size cut-outs for the upstairs windows this weekend…. thinking a witch and Frankenstein, perhaps?
Hahaha, I’m on a roll! And yet I still have tons left …
Life-size cut outs sound like a blast!
{ 5 trackbacks }