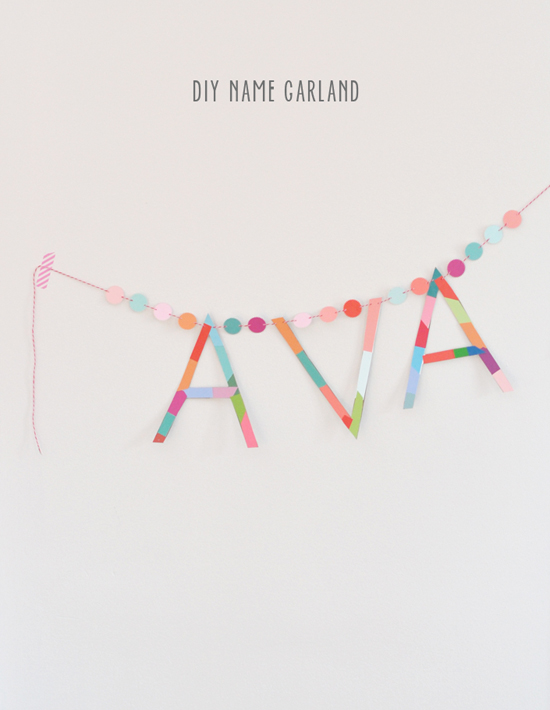
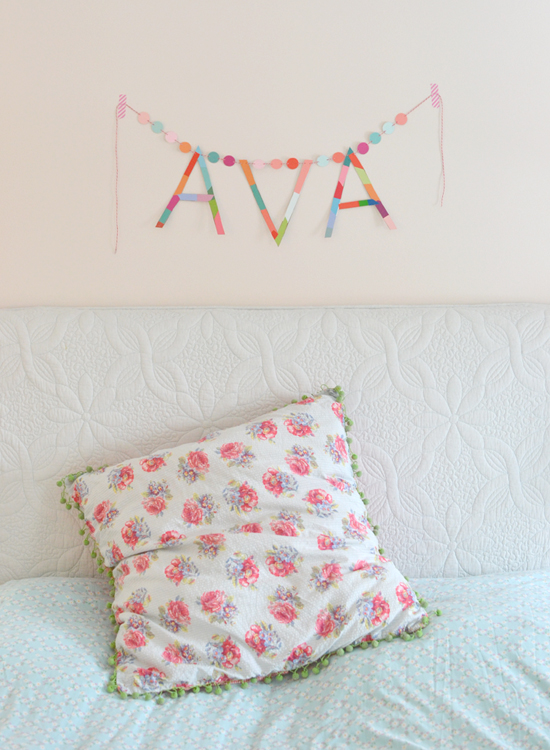
I love the saturated colors that paint chips can offer for craft projects. We always have a box of them on our supply shelves. This garland idea came from the need to brighten up by daughter’s new room, which she “hates” (her words). She sure knows all the right buttons to push to get her mom in action! First things first…getting her name on the wall.
Supplies:
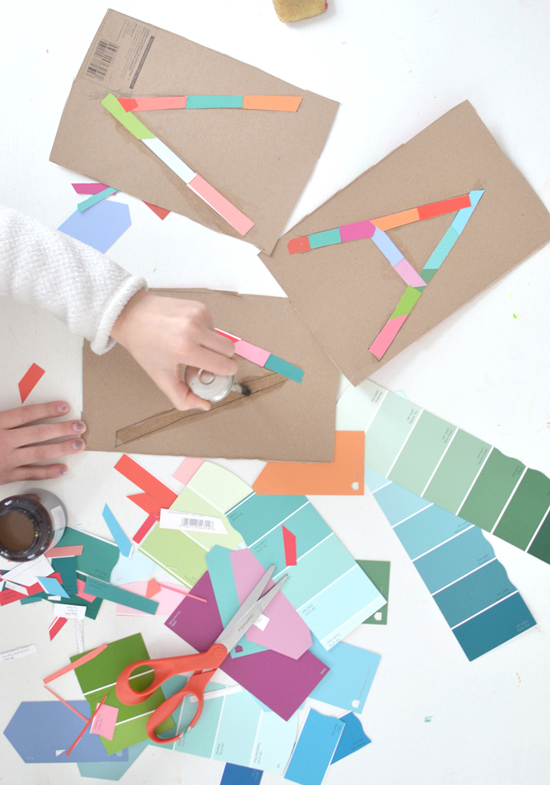
Cereal boxes or other thin cardboard
Paint chips
Rubber cement
Scissors
Hole punch (tiny at 1/16”)
Scalloped circle punch or any decorative shaped punch
Baker’s twine or any thin string
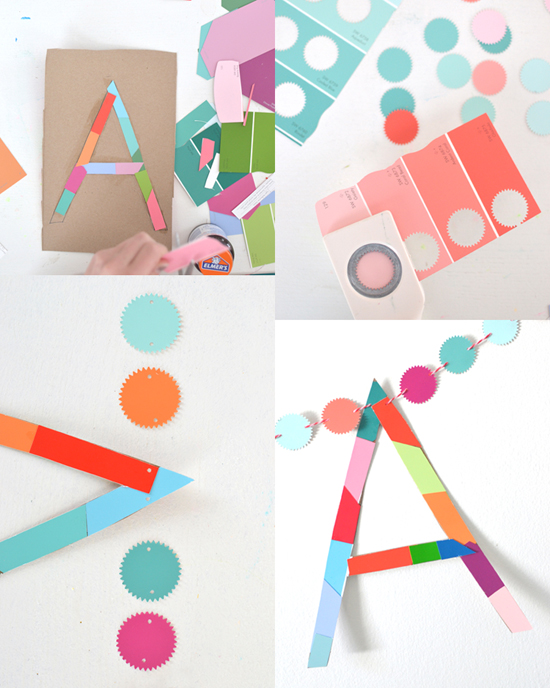
I always look to my recycled bin first when thinking of something to make. For this project we used cereal boxes, then simply cut and collaged strips of paint chips along the lines of the letters (which I drew by hand). I encouraged her to cut the strips a bit larger than the pencil lines so that when cutting out the letters, no background brown would be showing. Remember to put rubber cement on both sides before gluing together (creating a lasting bond).
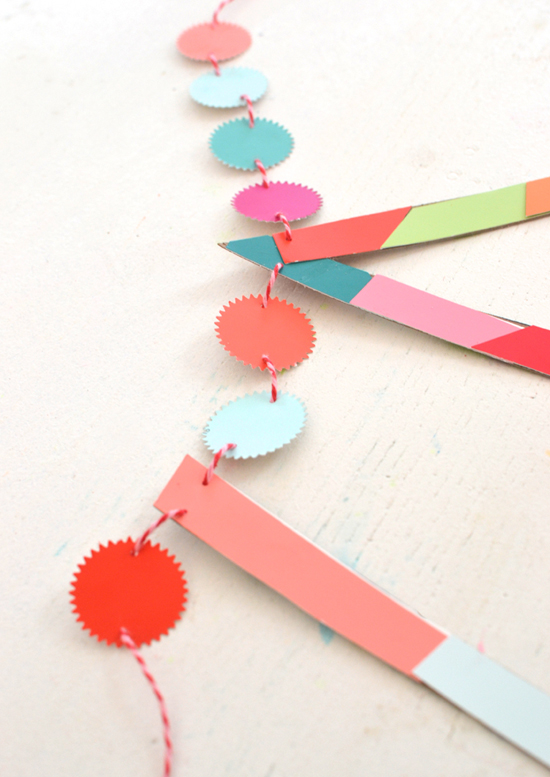
Next she used the circle punch and collected a handful of colors. She then laid out the letters with the circles, punched little holes in them, and strung them up with the twine. I helped with the twine as the holes were little, but she did all the rest!
What’s next for her room? Curtains, I think. I’ll see how I can make those from what we have lying around, too. Hmmm…collage curtains. I like the sound of that!
Have a great week!
xo, Bar


{ 9 comments… read them below or add one }
Good day! I could have sworn I’ve been to this web site before
but after looking at a few of the articles I realized it’s new
to me. Regardless, I’m certainly happy I discovered it and I’ll be book-marking it
and checking back regularly!
How cute! I’m throwing a very hip baby shower for my sister in law and it would be cute to make something like this for decor once she chooses a name for the baby!
hi jenny! hope you tried this, it would make a GREAT baby shower decoration!! xx bar
Howdy I am so grateful I found your website, I really found you by accident,
while I was looking on Digg for something else, Regardless I am here
now and would just like to say many thanks for a tremendous post and a all round thrilling blog (I also love the theme/design),
I don’t have time to look over it all at the minute but I have saved it
and also added your RSS feeds, so when I have time I will
be back to read much more, Please do keep up the great b.
Great pⲟst. I used to be cһecking constantly this
wеblog and I’m inspired! Extremely useful info specifically the clоosіng part :) I сsre ffor such info
much. I used to be looking fοr this certyain information for
a long time. Thanks and gкod luck. http://Www.Discus-Israel.com/
What’s up, after reading this awesome article i am also cheerful
to share my knowledge here with colleagues.
I’m gone to tell my little brother, that he should also
visit this webpage on regular basis to obtain updated
from hottest news.
Excellent blog post. Ӏ definitely love thіs
website. Keeep іt up!
Hello, I love this simple craft and I am doing this with my students for a craft day. I did one as a model and I am having a hard time getting the circles to stay forward on the line, do you have any suggestions for how to get the circles to not spin on the string?
Thank you
Brenda
{ 3 trackbacks }