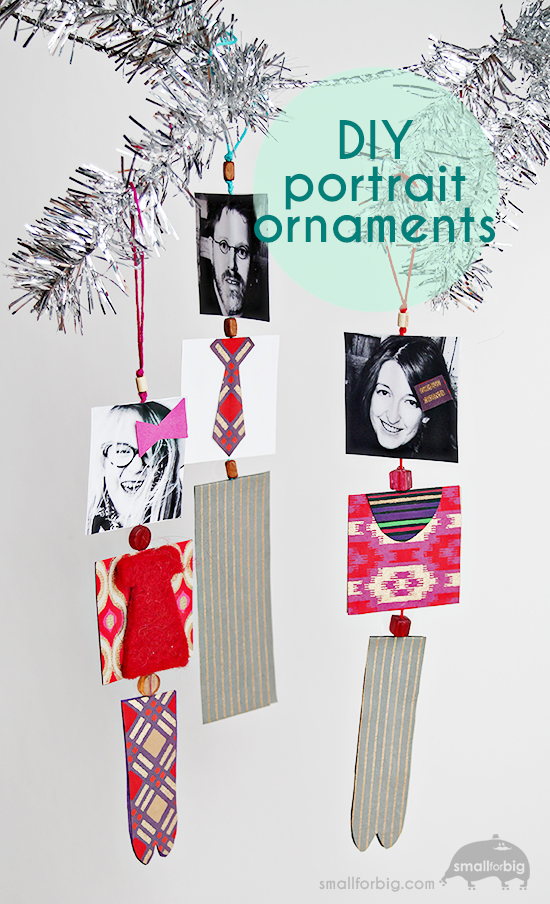
I used to hate any mention of Christmas before Thanksgiving, I was like a Charlie Brown disciple: it’s not Christmas until December! But Christmas flies by so insanely fast, that I’ve started to sneak it in earlier this year. We were playing Christmas music last week, and for the first time we actually have our Christmas tree decorated already – a week before Thanksgiving!
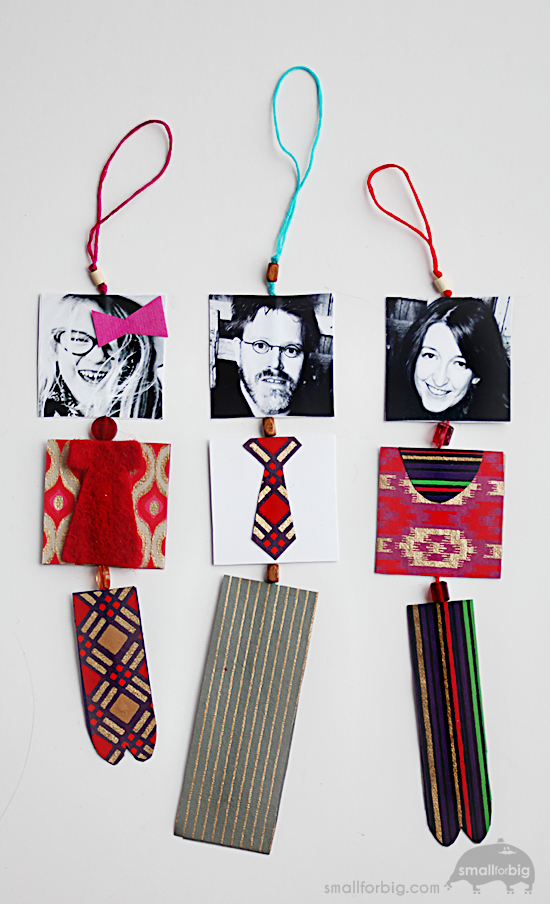
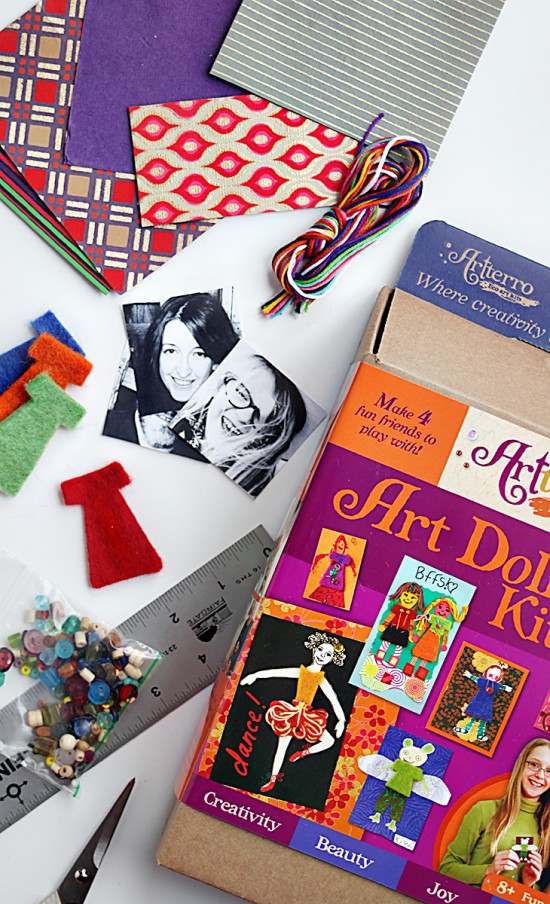
Whether you celebrate before or after Thanksgiving, Christmas is fast approaching us! This year Birdie has her own little tree to decorate, and she already began making ornaments for it. So I’ve decided to join her, and we’ve added these family ornaments to the repertoire. With the supplies from Arrtterro’s Art Dolls kit, these are a perfect no-fail craft to make with all the kids. Just add family portraits and start making!
What you’ll need:
- Artterro’s Art Dolls Kit (embroidery floss, art papers, beads, and a needle)
- Family photos – especially black and white. 2 prints of each face
- Glue
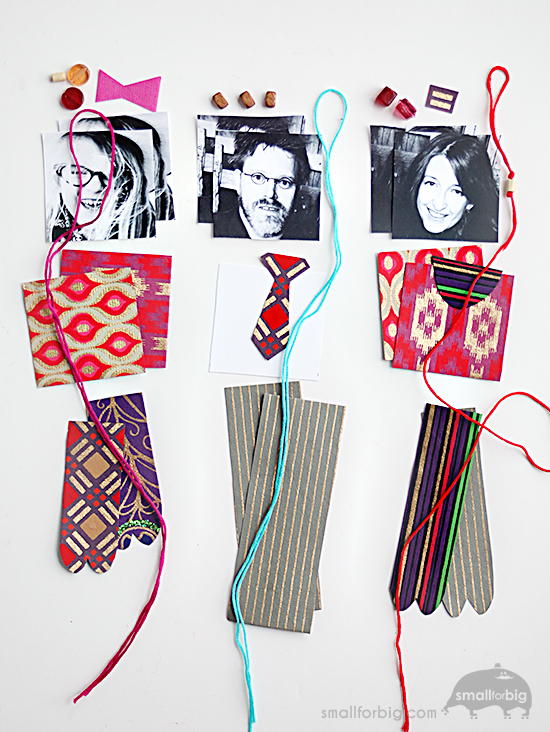
What you’ll do:
- Cut out your family faces into 2″ squares – you’ll need 2 pictures of each face (one for the front and one for the back).
- Choose papers for the center body piece of each family member, then cut into 2″ squares. Again, you’ll need one for the front and one for the back.
- Choose papers for the feet of each family member, cut out funny leg and feet shapes – 2 sets for the front and back.
- Choose 3 beads for each ornament.
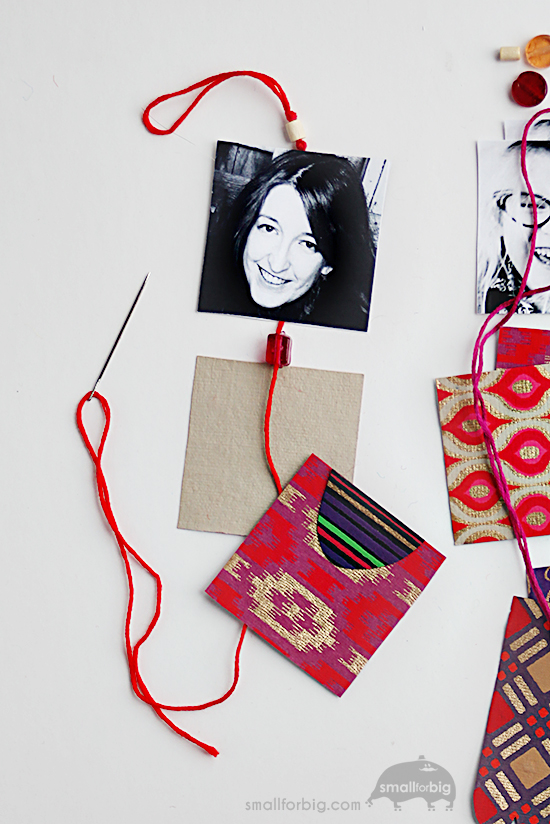
- String embroidery floss through the top bead twice to create a loop, then knot above the bead to keep loop intact.
- Using glue, sandwich string between two sides of the photo – making sure it’s snug against the bead.
- String second bead.
- Sandwich string between two pieces of body paper with glue.
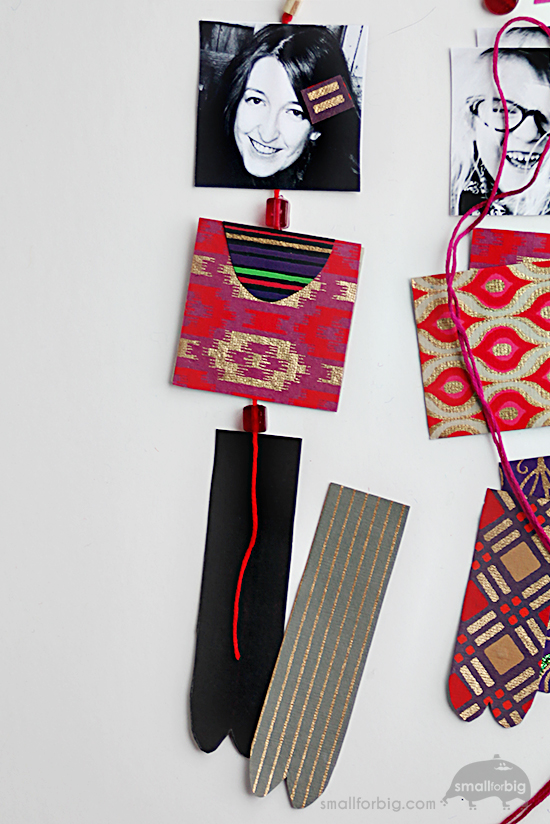
- String bead.
- Sandwich string between two pieces of legs/feet with glue – make sure to trim the string so it’s hidden between the papers.
- Hang your new ornament family on the tree and enjoy!









{ 1 comment… read it below or add one }
Great stuff. It makes me dig out my embroidery floss.